IMAP Migration Tool - Product Guide
Check-out the complete working procedure below, after this you can easily use the software.
Download » Install » Launch from Start » All Programs » Birdie IMAP Migrator » into any Windows OS Version.
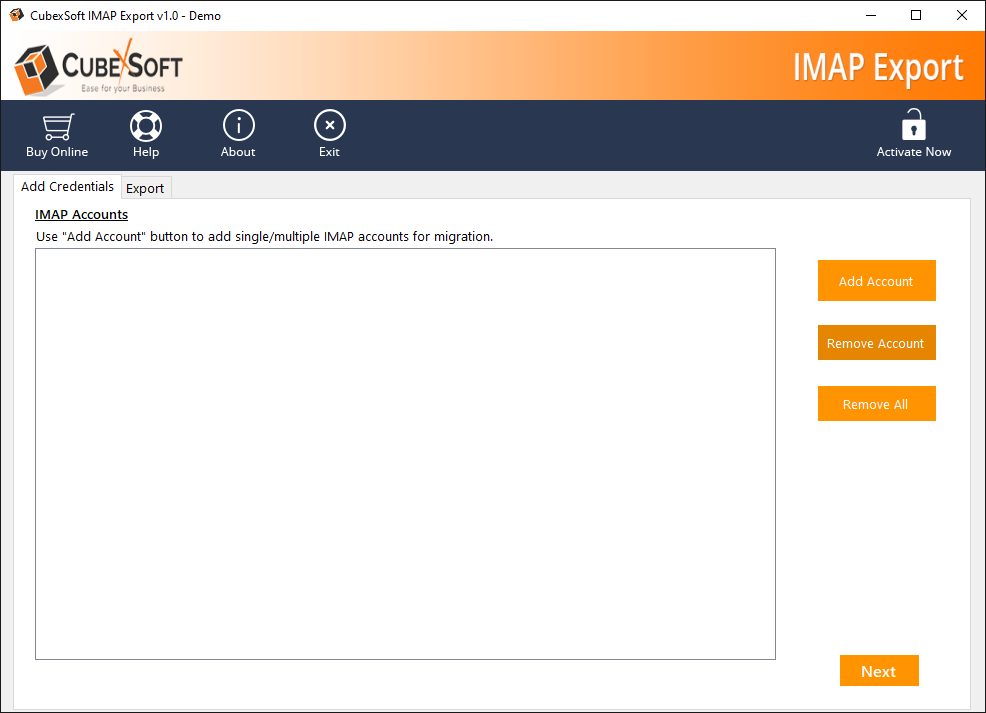
Now, click on Add Account button and fill all the important details of IMAP email account from which you want to export data.
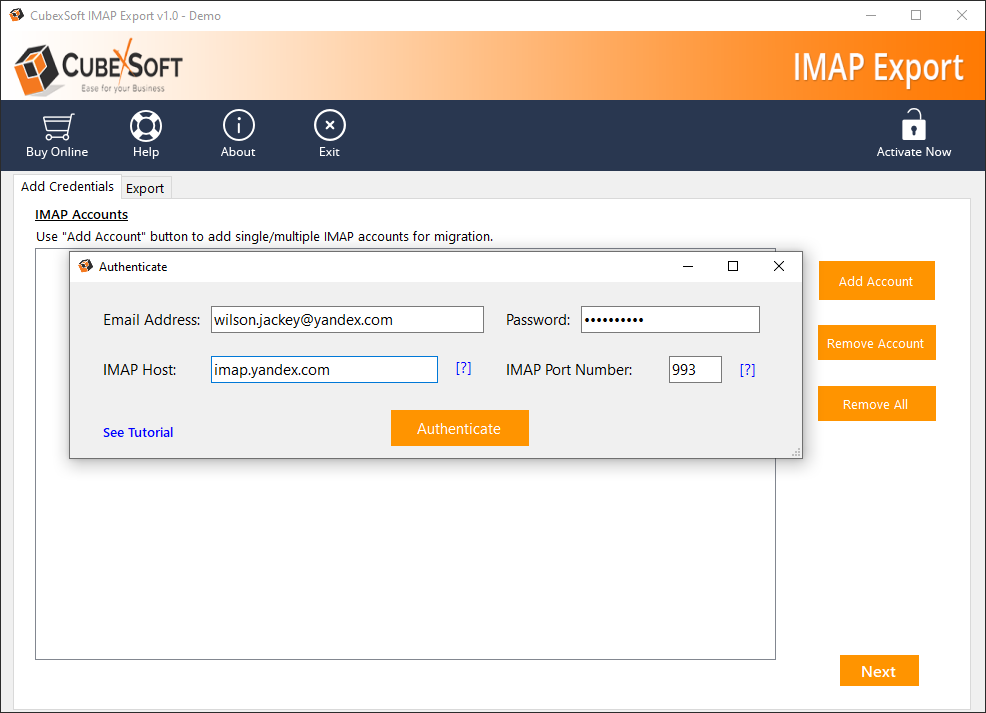
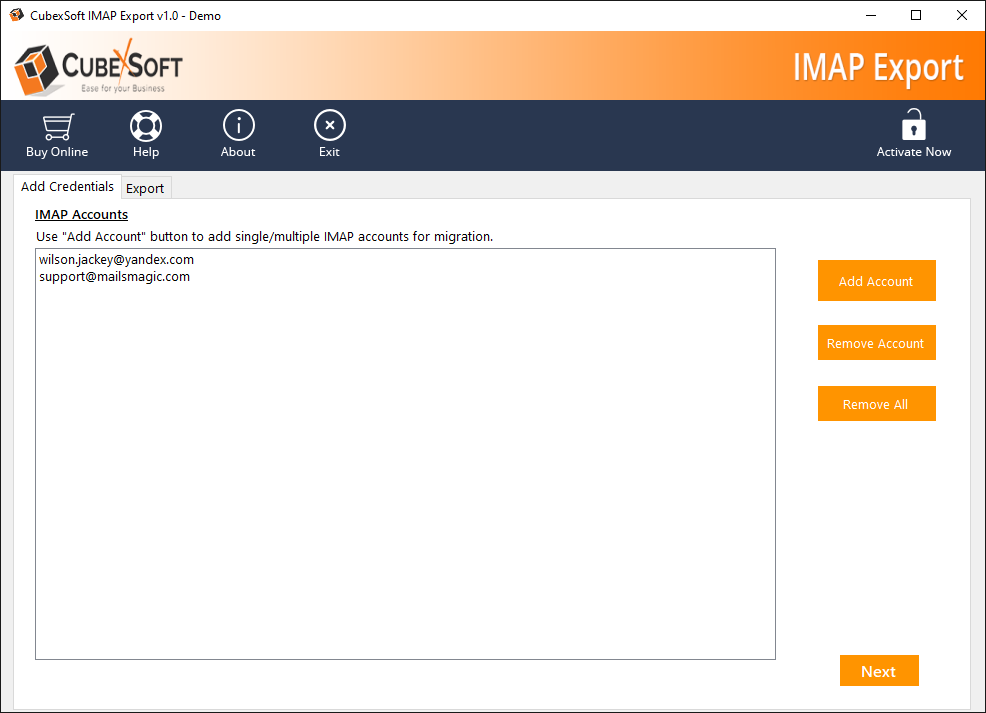
After adding account details, you can click on Authenticate buton which can successfully authenticate your account into the software screen. To export multiple IMAP account, you can add the details one by one.
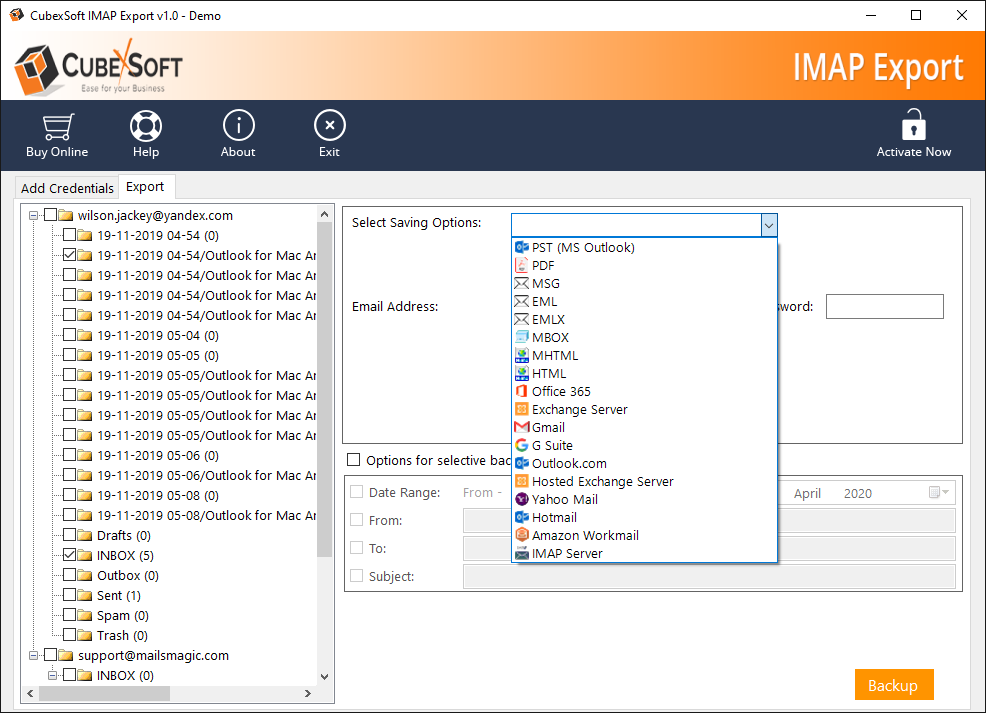
Click on Next button that opens a new Window with lot of options. In this Window, you can choose the IMAP folders from the left pane.
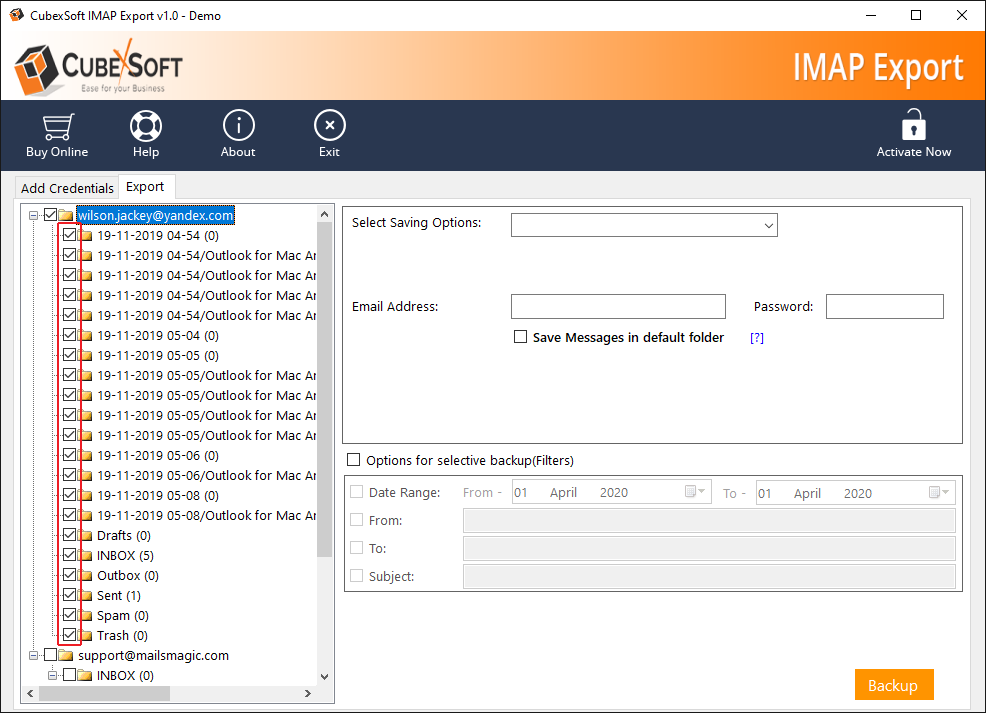
After selecting IMAP folders for migration, choose saving output format from the list of output options as mentioned in the screenshot:
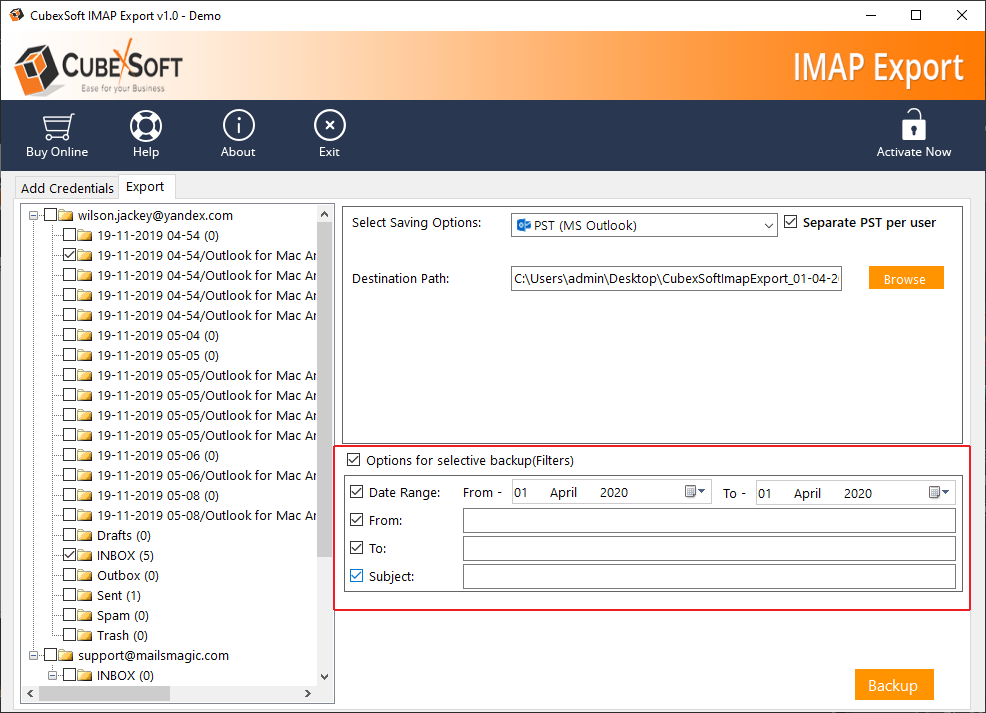
In this step, you need to add the location path for output files by using Browse button. If you want to export IMAP data to any cloud apps, then you need to add the login details of cloud application. Then, apply advance filters if needed.
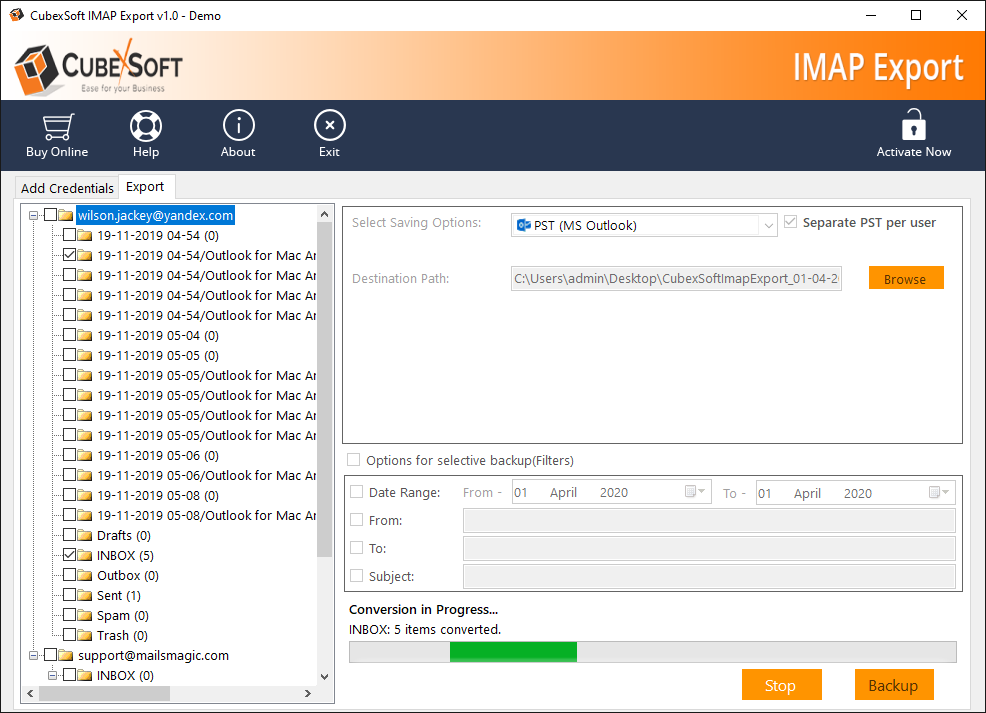
Finally, click on the Backup button that begins the live IMAP migration process on the software screen.
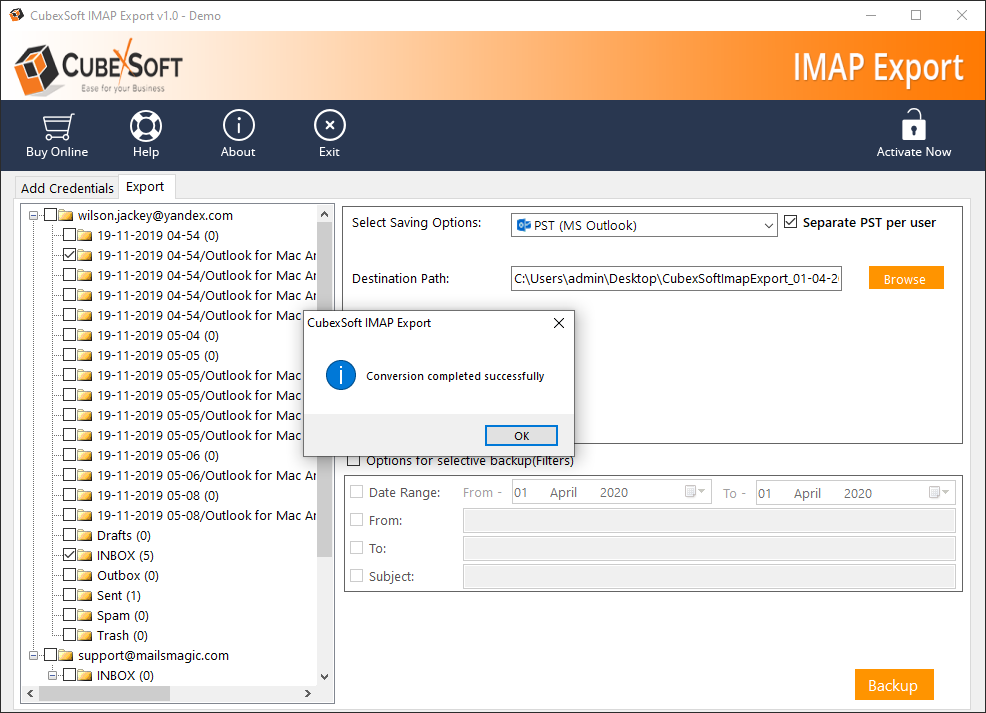
The IMAP Migrator completed the migration process by showing a confirmation message i.e. Conversion Completed Successfully.
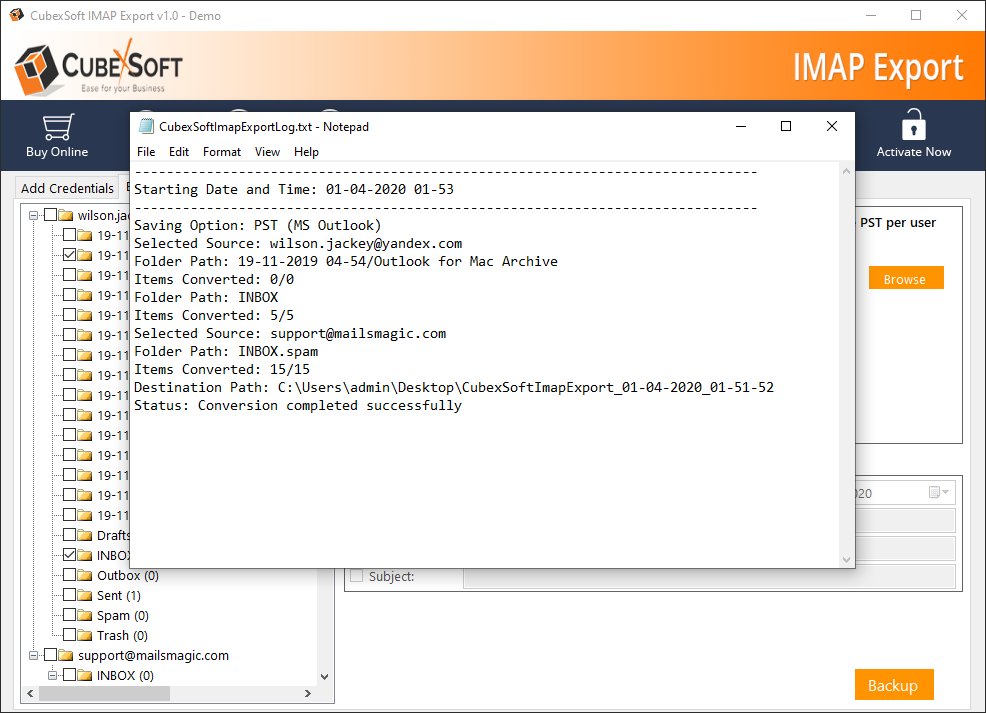
When the process is finish, the software opens a Notepad that includes complete information about IMAP migration process. Performer can save this report for future analyzing purpose.
FREE Download Now
For Windows 10/8.1/8/7/Vista/XP Buy Online at $69.00
Order & get full-featured software
